
Tutorial DIY Custom Monogramming
- Dec 18, 2017
- 4 min read
Recently, I have been monogramming gifts. Gifts made obviously for one person in mind seem to stand out more than a standard generic gift bought or made. Personalizing a project puts that professional touch and can be done without the use of a CNC machine. The process can be replicated for any application. Here I use it to make a custom table out of white oak, but you can use the same steps for anything including monogramming to sign building.
Best Router For The Job
I looked at a few options leading up to this project for which router to use and how. I needed a router that was good quality and one that I could have confidence in to handle well enough for the fine lines I was planning. I looked at using a piece of clear acrylic plastic with a router screwed to it, but it just didn't offer a clean enough solution. I tried monogramming some cutting boards using a palm router, but it skipped and moved making the results less than desirable. I knew I needed a router that I could adjust the depth precisely and control comfortably on a high speed. This left me to find a router that would not only get the job done, but would be able to perform with the precision I needed it to.

This IS the router for the job. For starters this router has the consistent power needed to move smoothly, with a 2.3 HP 15 Amp motor this router is the muscle car of routers. Micro depth adjustment on this router is as smooth as butter making setting the bit depth a breeze. The router comes with a LED lit clear acrylic plate that makes following the outline very easy. The soft start works amazingly for easing into the precise cut without jumping around. Most importantly the trigger is located right in the grips meaning you never have to take your hands off the tool from start to stop. Using the contour handles is not only safer but so comfortable it feels like I am holding a steering wheel on a Sunday drive. This router is one of those tools you don't just use for certain projects, it's one of those tools you create projects for so you can use this tool all the time.
On To The How To
Tools Needed:
Wax Paper
Scotch tape
Ink Jet Printer
Safety Glasses
Router
Orbital sander
1/4" V cut bit
Epoxy (optional)

STEP 1
First things first, you need to make a stencil. All you need is an ink jet (not laser) printer and some wax paper. Tape or staple the wax paper to a regular piece of paper and cut the wax paper to standard paper size sheets. Select the font and size you want and reverse the image. Print them on the printer with the wax paper face down still taped or stapled to the standard printer paper. Place the wax paper on the work surface you're going to use as soon as possible and make sure it's square to the edges. Press down on the lettering and rub out the ink with a card.
TIP: Some edges may get smudged on application or in the printer. Connect the spaces using a pencil.

STEP 2
Using the router, start at the top and slowly follow the outside of the outline. Move the router towards yourself whenever possible so you can see the lines easier. I recommend using a V-groove bit with the bit adjusted to a shallower depth than the desired finish. Then go over the lines again with the same V-groove bit set just a little bit deeper. Make sure to follow the center of the first cut. This will allow the bit to move smoother and remove any slips or nicks made in the first cut if the router jumps a little.
STEP 3
Take a piece of lower grit sand paper and clean out the grooves. I recommend using a piece of sheet paper folded in half.
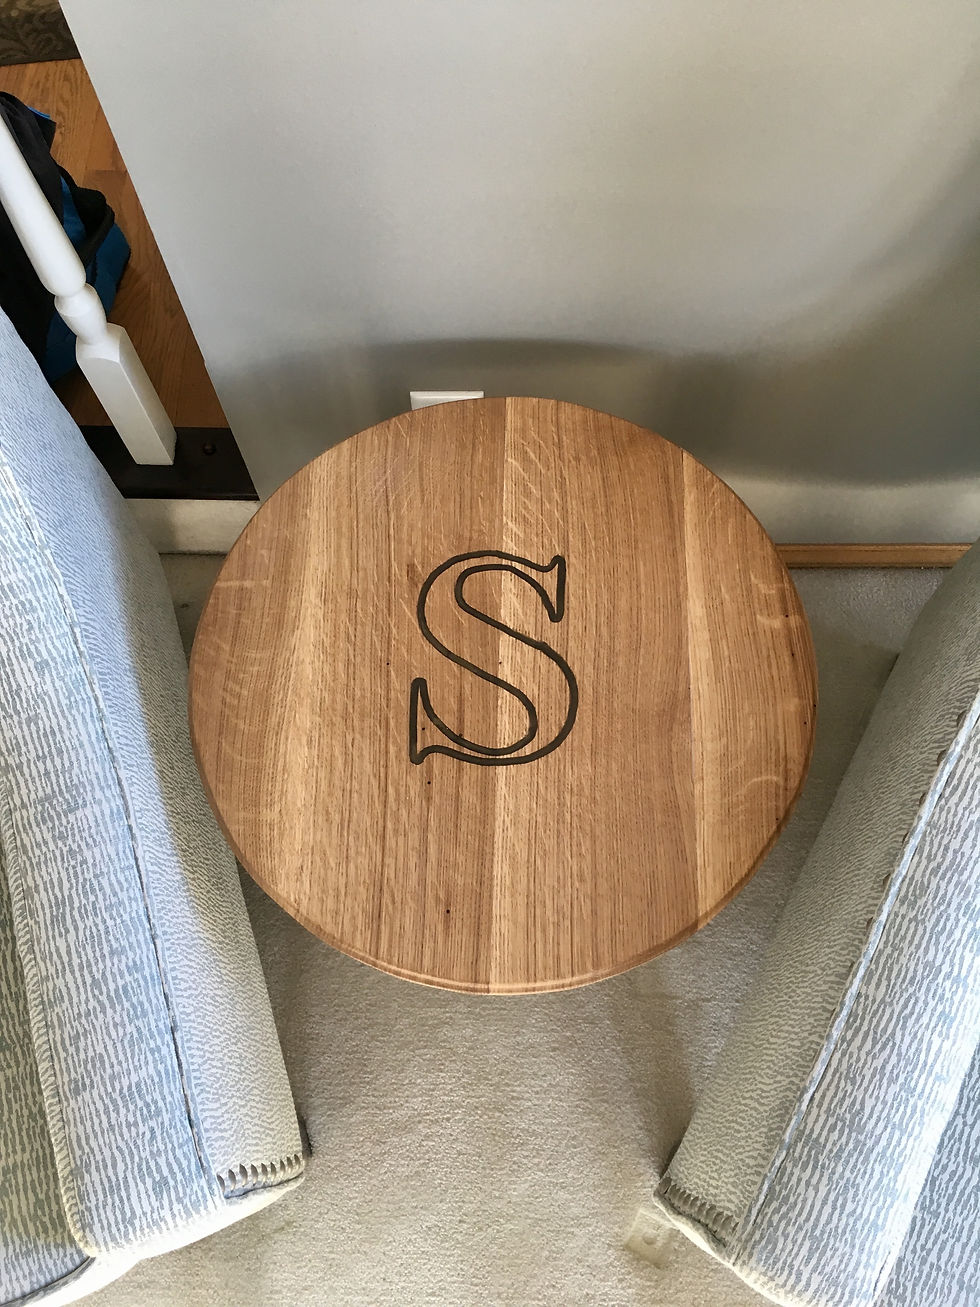
Finishing your newly made grooves is just as important as making them. I prefer to fill mine with epoxy. On this table, I used Bronze epoxy in the lettering but you can use any finish or color you like once the grooves are smoothed out.
STEP 4 (optional)
Using an epoxy of your choice, mix it together. Add color by adding a few drops of acrylic

paint while you are stirring. Tape off around your outline with painters tape to help make cleanup easier. Pour in the epoxy just short of full. Taking either a torch or a heat gun heat up the epoxy passing over it evenly to remove bubbles and even out the epoxy. Allow to dry over night. Finish the surface by sanding the epoxy with 80 grit sandpaper to remove the excess epoxy. If desired, continue to work through the sandpaper grits (for a smoother finish work through to 300 grit sandpaper). You can also paint the grooves or burn them with a soldering iron instead of using epoxy.
Tip: Use Windex to clean and shine the epoxy in your new monogramming.
That's all! The technique can be re-applied using the same method to any project!
If you have any questions about the Bosch MRF23EVS router or any steps of this process, please feel free to get in touch and I'll be happy to help.


Comments